Trail Notes
The Needles Trails backcountry zone offers many opportunities for backpacking trips, many of them without the problematic vehicle shuttle. The following description outlines one excellent route, but you can customize your own trip by studying the map.
Although this trail description starts and ends at the Squaw Flat Trailhead, you could start or finish at two other trailheads (Elephant Hill, Cave Springs/Salt Creek) and cover the same territory. However, Squaw Flat is the most accessible trailhead, and you can get there with any vehicle.
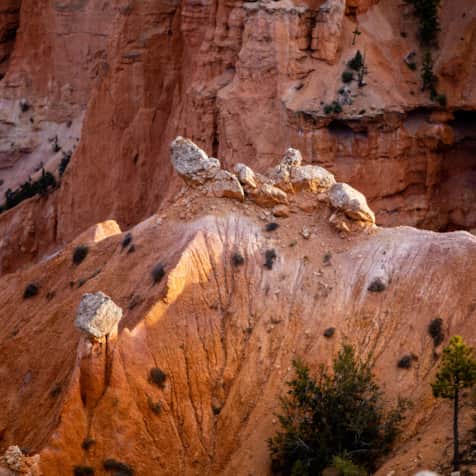
This loop hike has many interesting side trips, such as Peekaboo Spring, Upper Lost Canyon, Druid Arch, Elephant Canyon, and Chesler Park Overlook.
The loop can be done in either direction with no real advantage or disadvantage, but this description follows the clockwise route. In any case, plan on a heavy pack, at least for the first two days, because of the amount of water you need to carry.
There are very few water sources in the Needles backcountry and what is available is best preserved for the natural organisms that rely on it for survival. The amount of water you need will be the limiting factor for your trip length. Contact the canyres@nps.gov for water source information.
Deciding on the length of your trip depends on how much water you can carry, how many miles you can cover in a day, and how much time you have available. This description covers the three-night/four-day option, but here’s a quick summary of other options:
| Length of Trip | Backcountry Campsite | Miles Per Day | Side Trips |
| Two Nights | 1—SQ2 2—DP1 |
1—5.7 miles 2—8.6 miles 3—7.7 miles |
Upper Lost Canyon Chesler Park Overlook |
| Three Nights | 1—LC3 2—CP2, 3, 4 or 5 3—DP1 |
1—5.2 miles 2—2.6 miles 3—5.3 miles 4—3.8 miles |
Upper Lost Canyon Druid Arch Chesler Park Overlook |
| Four Nights | 1—LC1 2—LC3 3—CP2, 3, 4 or 5 4—DP1 |
1—2.6 miles 2—2.6 miles 3—5.3 miles 4—3.8 miles 5—7.7 miles |
Peekaboo Spring Upper Lost Canyon Druid Arch Chesler Park Overlook |
| Five Nights | 1—LC1 2—LC3 3—CP2, 3, 4 or 5 4—DP1 5—EC1 |
1—2.6 miles 2—2.6 miles 3—5.3 miles 4—3.8 miles 5—3.6 miles 6—4.1 miles |
Peekaboo Spring Upper Lost Canyon Druid Arch Chesler Park Overlook Elephant Canyon |
* Note: Be sure to get a map from the NPS showing exact locations of backcountry campsites.
The Hike
The first 1.1 miles of this hike follow a flat and easy stretch of trail with several slickrock sections. Be alert not to miss the sometimes small cairns marking the correct route over the slickrock. After the first 1.1 miles of easy hiking, you reach the junction with the Peekaboo Trail. Take a left (east) and head toward Lost Canyon and Peekaboo Spring. Most of the next 1.5-mile section is slickrock. After climbing down a small ladder, the trail follows the north rim of a beautiful, narrow canyon for a short way before dropping into the canyon on a sandy trail for the last half mile to the junction with the Lost Canyon Trail. Take a right (southwest) here and start hiking up Lost Canyon. In spring a healthy stream often flows through this lush canyon.
When going through Lost Canyon, watch carefully for an abrupt right-hand turn in the trail. There is a sign pointing to Squaw Canyon Trail, but if you’re absorbed in the scenery (which could easily happen), you might miss it. On the ground the trail seems to continue into Upper Lost Canyon, but at this point the official trail leaves Lost Canyon and dips into a narrow, unnamed canyon that runs north to south. If you have time, you might want to hike into Upper Lost Canyon on a side trip.
When you reach the Druid Arch Trail up Elephant Canyon at the 8.8-mile mark, you find a sign marking the junction right in the dry wash. Take a left and head toward Druid Arch.
After a half-mile walk up Elephant Canyon, you see a junction with the trail going west to Chesler Park. If you’re staying out for three or more nights, you probably have time to visit Druid Arch. If so, drop your pack somewhere around this trail junction and take a left for the scenic side trip up to awesome and well-named Druid Arch. When you get back to your pack, take the right fork (west) at this junction and go another mile to your camp at one of the four Chesler Park backcountry campsites. CP3, CP4, and CP5 are on your right just after you reach the junction with the Joint Trail, and CP2 is another 100 feet down the trail on your left. All four sites are nestled amid the large boulders surrounding Chesler Park.
After enjoying your second night out on the rim of spectacular Chesler Park, keep heading west on the Joint Trail. In another 0.7 mile you come to a junction where the Joint Trail drops down into the Joint, and a side trail turns left to the Chesler Park Overlook.
If you want a short side trip, drop your pack here, grab a water bottle and a snack, and take this short trail up to the overlook. The side trail follows cairns for about a quarter mile to the top of a slickrock ledge—a great place to relax for a while and soak in the quiet beauty of the Canyonlands. From here you can see Chesler Park and the ring of sandstone spires that surround it. You’ve been able to see Chesler Park from your camp and from the trail, but the view is not nearly as dramatic as it is from this viewpoint. After you return to your pack, head into the Joint — a giant crack between rock formations that goes on and on, sometimes tight enough to make getting a big pack through difficult. Several trails in Canyonlands and Arches have similar joints, but this is by far the longest.
After about a quarter mile in the Joint, you finally break out into the sunlight again. From here it’s about a half mile on a fairly rocky trail to the Chesler Park Trailhead, where you’ll find a vault toilet and picnic tables. From here walk down the road for 0.5 mile until you see the road to Beef Basin heading off to the left (south). You go right for another 0.3 mile until you see the Devils Pocket Trail veering off to the right.
The Devils Pocket Trail starts out through a flat, brushy meadow. After 0.8 mile you see the Chesler Park Loop Trail going off to the right (east). Take a left and make a fairly serious climb through a pass in the enormous Pinnacle Formation. After the pass the trail drops into another dry, brush-covered flat, affectionately referred to as Devils Pocket.
In less than a half mile, you see the short side trail to Backcountry Campsite DP1 going off to the right. The campsite is about a quarter mile from the trail amid some large boulders and piñon pine trees. If you’re out for 3 nights, DP1 is probably your best choice for a backcountry campsite. This leaves a tough 7.7 miles for the fourth and last day of your hike, but your pack will be its lightest on the last day as you deplete your water supply. (However, if you would like a short hike for the last day, you can go by DP1 and on to EC1, which would mean 7.4 miles of hiking on the third day but only 4.1 miles on the last day.)
From DP1 it’s only about a half mile to Devils Kitchen Camp, where you can find a vault toilet and picnic tables and four vehicle campsites. Some maps might not show it exactly this way, but the Devils Pocket Trail ends right on the road in Devils Kitchen and then heads out the east side of the vehicle camp. The trail out of Devils Kitchen is confusing. There are several unofficial trails that have been made by visitors of the popular campground. Watch for the cairn-lined trail heading east from the vault toilet on the east end of the campsites. If there’s any question in your mind, check the topo map and compass to make sure you don’t have to backtrack to find the official trail.
After hiking 2.3 miles from Devils Kitchen, turn left (east) onto the trail to Elephant Hill Trailhead. On this short (0.6-mile) section of trail, you get fantastic views of the Pinnacle and the Needles before dropping into the dry wash of Elephant Canyon. From here take a short trail north down the canyon to EC1 if you’ve decided to camp there.
If you’re heading back to your vehicle, go across the dry wash on another 0.6-mile section of trail to a junction where you have a choice of trailheads. If your party had two vehicles, you may have left one at Elephant Hill Trailhead and can cut 2.3 miles off your trip. If so, take a left (north) to Elephant Hill. If not, take a right (east) to Squaw Flat Trailhead.
Miles and Directions
0.0 Start at the Squaw Flat Trailhead.
0.1 Junction with Squaw Canyon Trail; turn left.
1.1 Junction with Peekaboo Trail; turn left.
2.6 Junction with Lost Canyon Trail; turn right.
2.7 Backcountry Campsite LC1.
3.8 Backcountry Campsite LC2.
5.1 Backcountry Campsite LC3.
5.3 Sharp right turn (south) onto Lost Canyon Trail.
5.6 Backcountry Campsite SQ2.
5.8 Junction with Squaw Canyon Trail; turn left.
6.7 Junction with Big Spring Canyon Trail; turn left.
8.8 Junction with Druid Arch Trail; turn left.
9.3 Junction with Druid Arch West Trail; turn right.
10.3 Junction with the Joint Trail; turn right.
10.4 Backcountry Campsites CP2, CP3, CP4, and CP5.
11.0 Spur trail to Chesler Park Overlook and start of the Joint; turn left.
11.8 Chesler Park Trailhead.
12.3 Junction with road to Beef Basin; turn right.
12.6 Trailhead for Devils Pocket Trail.
13.4 Junction with Chesler Park Loop Trail; turn left.